
Sadly we have come to the final part in the amazing tutorial series by my mom, and fearless photog, Judi from Judi FitzPatrick Studio. I hope you've all enjoyed this series as much as I have! I really can't wait to start experimenting with various lamps and light sources with my lightbox so I can get some amazing product photos of my smaller items.
The final part of the series is all about the photos so read on and enjoy and don't forget if you're looking for some unique holiday cards for your friends and family my mom carries lots of options in her shop, the cute snowman up there is available as Snowman Wishes Handmade Holiday Card so read through the tutorial then stop on over to Judi's shop for your holiday cards today!
**************************************************************************
Hi Readers,
This is the third and final installment on product lighting. First you learned how to create a simple light box. Next you learned at least one way to light up the box.
Now that you’ve got a well-lit place to shoot your product, it would be best if you could do that without the possible blurry shot that sometimes occurs from hand-holding the camera. But suppose you have no tripod, and don’t want to invest in one for a few product shots. You're about to learn that you don’t necessarily need one.
The bottom line is you just need a flat, level, stable surface on which to place the camera. So, you might think – “why not just put the camera on the table in front of the box and take the shot?” Good idea, except this is probably not the best angle for your product to be captured.
Instead, there are a couple of things that can be done.
First, you could use books, magazines, boxes or something else to raise your camera to a better height. Doing this so that the camera angles downward works really well to get the best shot, just be sure the camera is stable. You don’t want it to go sliding downward while snapping the photo, or worse yet, falling to the floor.
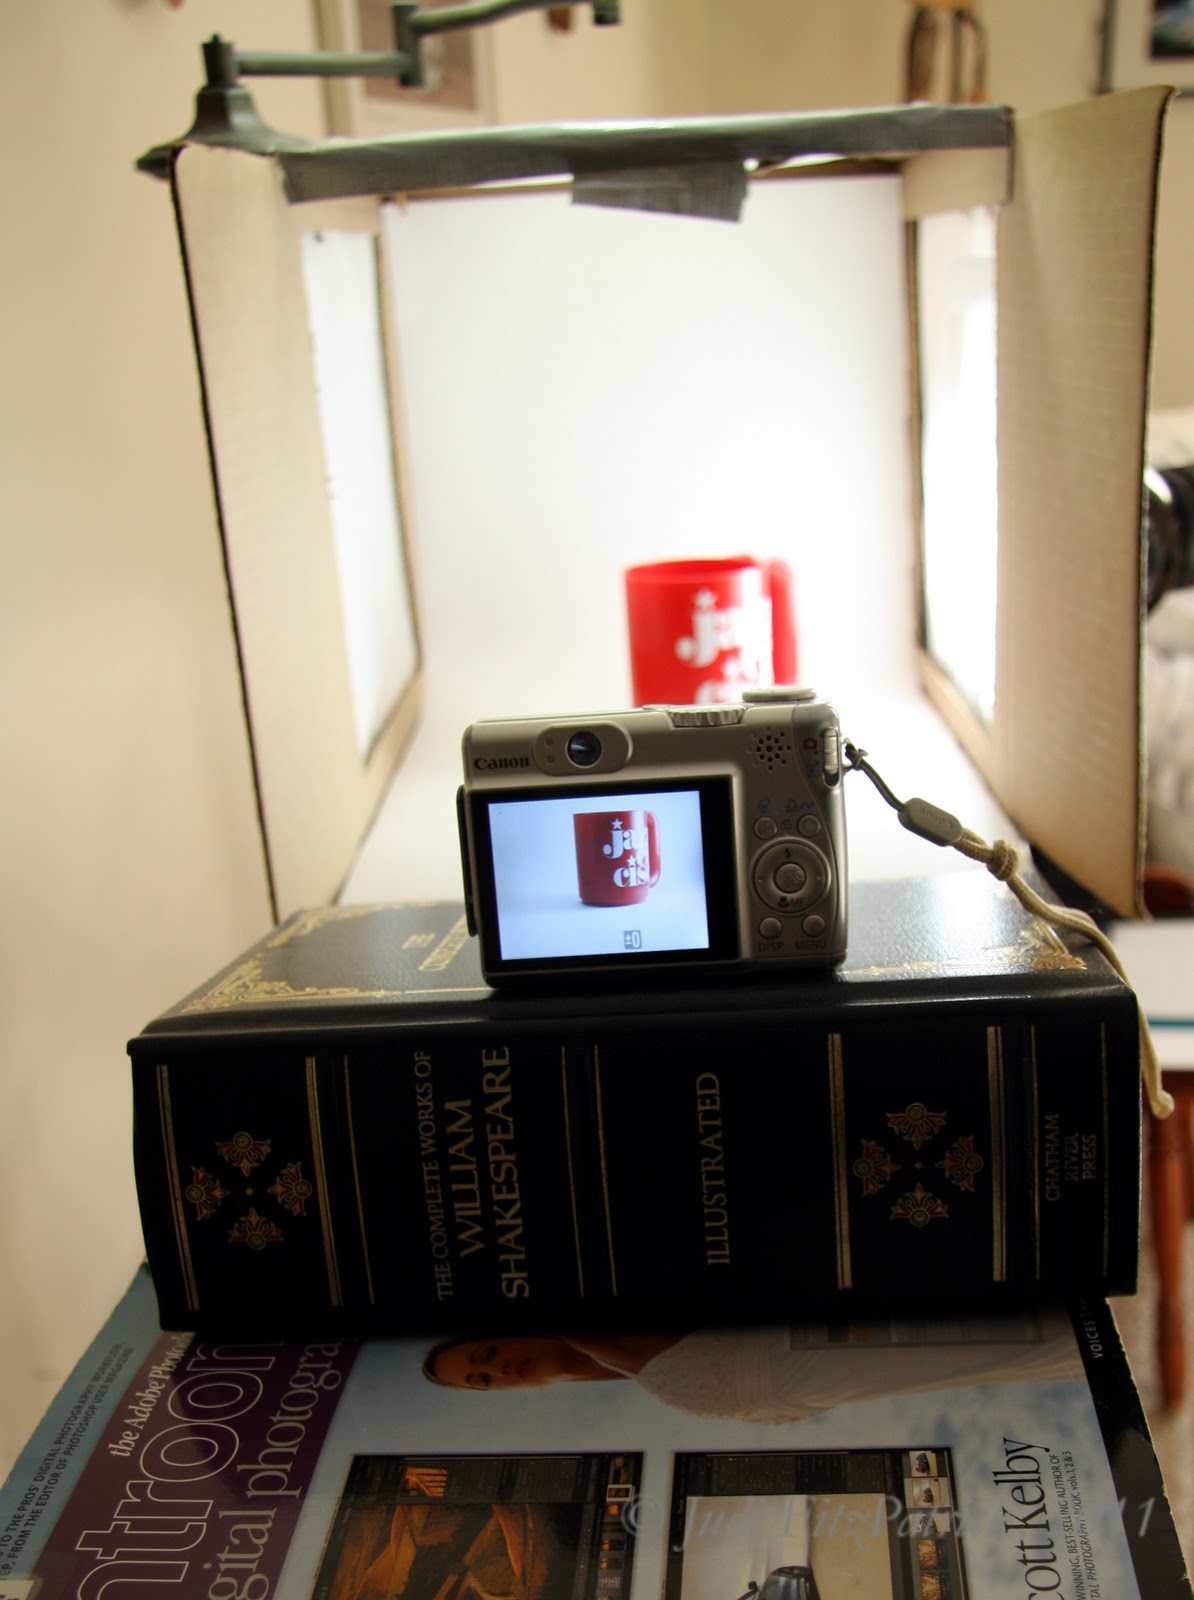
Second, you could angle the light box by raising the back edge from a few millimeters to a couple of inches. Raise the box with magazines, pieces of wood, or anything else that gives a useful angle in relation to the camera. This can be done alternately or in addition to the above suggestion
Place the product in the box, turn on the lights (if CFLs, let them warm up for a few minutes to obtain maximum light), aim and focus the camera, then take the shot. If your camera has a time-delay setting, I’d suggest using that. That is one way to avoid camera shake as you press the shutter. If you are fortunate enough to have a remote shutter release, even better – go ahead and use that.
Now you can take product shots anytime of day or night, whatever the weather, even inside a closet if you’re so inclined!

One more thing – you can use some of these techniques to take vacation or family photos in lower light, such as indoors or early morning / late afternoon. Consider placing the camera on the hood of your car, the top of a cement wall, on a porch railing, or any other place at the right height for the shot you want to take. Using either the time-delay or remote shutter means you can be in the shot with the other people or the scenery! Pretty cool, huh?
I hope you enjoyed this series and find it useful for taking better pictures.
Thanks once again to Jenn for inviting me to be a guest writer on her blog!
Peace to all,
Judi
**************************************************************************
Hello awesome! I don't know about all of you but I'll be making these tips work for me in product and people shots this holiday season. Thanks again to my mom for putting together such an informative and easy to follow guide to creating and using a lightbox. You can find Judi's tips and beautiful photography all over the web:
Etsy - http://judifitzpatrick.etsy.com/
Zazzle - http://www.zazzle.com/judifitzpatrick
RedBubble - http://redbubble.com/people/judifitzpatrick
Blog - http://judisjems.blogspot.com/
••••••••••••••••••••••••••••••••••••••••••••••••••••••••••••
To read the entire series...
Part I of III - Creating the Lightbox
Part II of III - Illuminate the Lightbox
Part III of III - Camera Position
3 comments:
Jenn, thanks so much for allowing me to help your readers with their small product photography. May your generosity be repaid 10-fold!
Peace and hugs, Judi (Mum)
WOW. Clear and easy to follow instructions!
Thank you Judi and Jenn for this series.
Great job!
Wonderful series on how to create and use a light box. When selling online all the customer has to go by are the photos and description of an item, so it is really important that photos show off the item to its fullest advantage. Photos can definitely make or break a sale. Thanks Judi for a series that was informative, interesting and well written. I think I see where Jenn gets some of her incredible talents. :)
Post a Comment